


Winterizing an outboard motor helps prevent freezing, corrosion, and improper storage damage. It focuses on three main goals: protecting the fuel system, safeguarding internal components, and avoiding ice inside the motor.
Why Winterizing Your Outboard is a Must

Winter storage poses real dangers. Unwinterized engines face three threats that can cause severe damage.
Freeze Damage
Freeze damage is the most immediate threat in a Canadian winter. Trapped water in cooling passages or the gear case expands by 9% when frozen, cracking metal parts. Outboards are self-draining if stored right, so trapped water is a significant risk.
Corrosion and Rust
Humidity in winter increases rust and corrosion risks. Cylinder walls and bearings may degrade, hurting performance and lifespan. Corroded parts may fail in the spring.
Fuel System Degradation
Modern gasoline, especially with ethanol, quickly degrades. If untreated, water separates and forms deposits that clog fuel parts, causing starting issues after storage.
Your Winterization Tools and Supplies
Gather the required tools and marine supplies first to avoid interruptions.
| Item | Purpose & Pro-Tip |
| Fuel Stabilizer |
Purpose: Prevents fuel degradation, phase separation, and the formation of gum and varnish in the fuel system. Pro-Tip: Select a marine-specific formula that includes additives to combat the corrosive effects of ethanol and absorb trace amounts of water. |
| Outboard Flushing Attachments (“Muffs”) |
Purpose: Connects a standard garden hose to the engine’s water intakes, allowing for a thorough freshwater flush. Pro-Tip: Ensure the muffs fit snugly over the intakes to create a good seal and prevent them from slipping off while the engine is running at a fast idle. |
| Lower Unit Gear Lube & Pump |
Purpose: Replaces old, potentially water-contaminated lubricant in the gearcase to prevent freeze damage and ensure proper lubrication. Pro-Tip: The gear lube pump is essential, not optional. It allows for filling the gearcase from the bottom drain hole upwards, which is the only method to prevent air pockets from forming inside the housing. |
| Fogging Oil |
Purpose: An aerosol spray that coats internal engine components (cylinders, pistons, rings) with a protective, anti-corrosive film. Pro-Tip: Be generous with the application; a thick, visible coat of fogging oil must provide a robust barrier against rust-forming moisture during storage. |
| Marine Grease & Grease Gun |
Purpose: Lubricates all external pivot points, linkages, and fittings to force out water and prevent corrosion. Pro-Tip: Use a high-quality, waterproof lithium-based marine grease. It offers superior adhesion and resistance to water washout compared to general-purpose automotive grease. |
| Engine Oil & Filter (4-Strokes Only) |
Purpose: Removes old engine oil, which is laden with corrosive acids, carbon deposits, and other contaminants from a season of use. Pro-Tip: Always use a marine-grade engine oil with an NMMA FC-W (Four-Cycle Water-Cooled) rating. These oils contain specific anti-corrosion additives that automotive oils lack. |
| Basic Hand Tools |
Purpose: To perform the various mechanical steps of the process. Pro-Tip: A comprehensive kit should include a socket set, a dedicated prop wrench, a spark plug wrench with a gapping tool, and a set of flathead and Phillips screwdrivers. |
| Waste Oil Container & Rags |
Purpose: To safely and cleanly collect used engine oil and gear lube for responsible disposal. Pro-Tip: Plenty of absorbent rags on hand, as changing outboard fluids can be messy. |
| Battery Terminal Cleaner & Protectant Spray |
Purpose: A wire brush cleans corrosion from battery posts and cable ends, while the protectant spray creates a barrier to prevent future corrosion. Pro-Tip: Clean terminals ensure a solid connection and reliable starting power in the spring. |
| Battery Charger |
Purpose: A “smart” charger that keeps the battery at an optimal charge throughout the winter without overcharging it. Pro-Tip: This device is far superior to periodic charging with a standard charger and significantly extends battery life.4 |
How Do You Winterize an Outboard Boat Motor
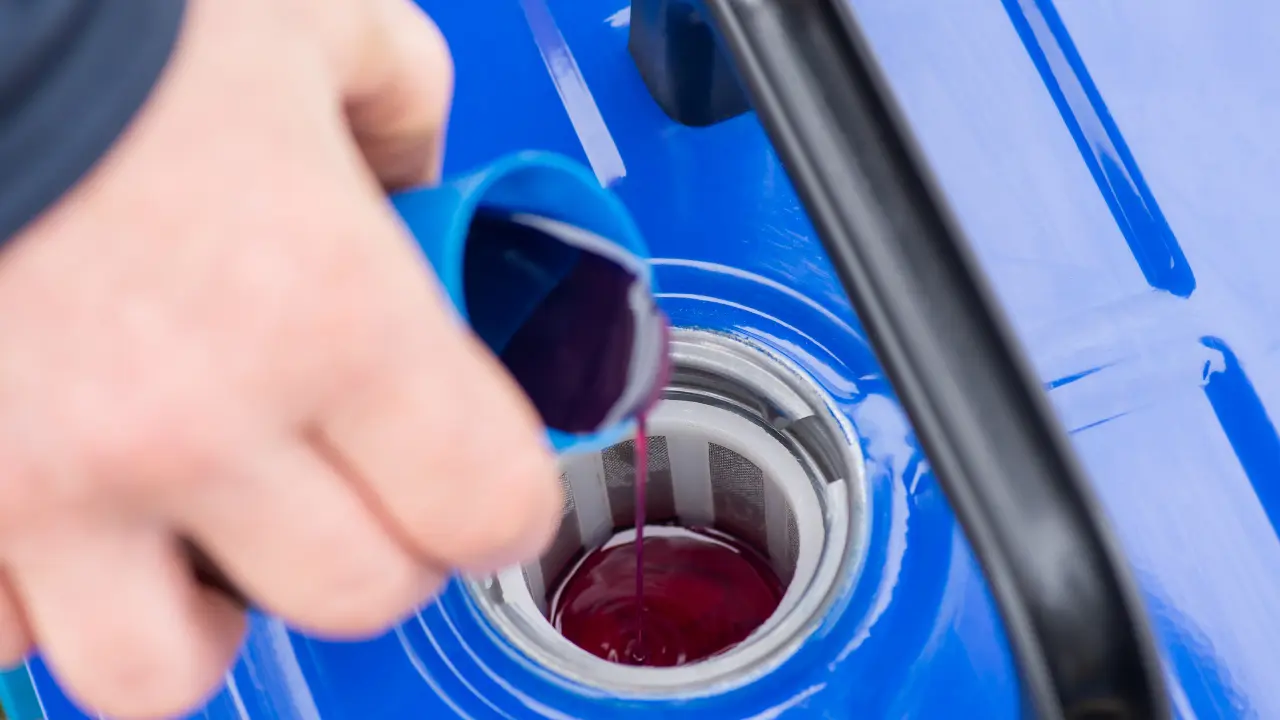
Step 1: Stabilize Your Fuel System
Treating the fuel in this step prevents it from clogging the system during storage.
- For permanent tanks, fill to approximately 95% to minimize air and water condensation risks. For portable tanks, draining is an effective alternative.
- Add marine fuel stabilizer as instructed. Run the engine on freshwater for 10–15 minutes to circulate the treated fuel throughout the system.
Step 2: Flush the Engine with Fresh Water
Flush the engine to remove deposits that cause corrosion and blockages.
- Attach the flushing muffs (soft rubber covers that fit over the water intake screens, allowing you to connect a garden hose) securely over the water intake screens on both sides of the lower unit.
- Turn on the freshwater hose and ensure a strong, steady water flow before starting the engine. Never run an outboard motor without a water supply, even for a few seconds, as this will destroy the water pump impeller.
- Start the engine and allow it to idle at a fast rate (approximately 1,500 RPM) for at least 10 minutes. Visually confirm that a steady stream of water exits the engine’s “telltale” outlet port. This indicates that water is circulating properly through the powerhead.
Step 3: Change the Lower Unit Gear Lube
Changing gear lube removes water-contaminated oil, prevents freezing damage, and checks the health of the lower unit.
- Position a suitable drain pan directly beneath the lower unit with the engine tilted down.
- Using a large flathead screwdriver, remove the bottom drain screw first. Then, remove the top vent screw (the vent screw, located at the top of the gear case, allows air to flow into the gear case while draining). Removing the top screw allows air to enter, enabling the thick lubricant to drain completely.
- Inspect the drained lube. A milky colour indicates the presence of water inside; fine metal shavings suggest excessive wear. Seek professional help for either issue before storage.
- Attach the threaded fitting of the gear lube pump to the bottom drain hole. The pump adds new, manufacturer-recommended gear lube (special oil for the gear case) until a steady stream of fresh lube flows out of the top vent hole.
- Install the vent screw, then the drain screw, to minimize lube loss as quickly as possible. Always use new gaskets.
Step 4: Address Engine Oil (4-Stroke vs. 2-Stroke Explained)
For 4-Stroke Outboards: Change Engine Oil and Filter
Change oil to remove corrosive contaminants that could cause winter damage to internal parts.
- The engine should still be warm from the flushing process performed in Step 2. Warm oil is less viscous and will drain more quickly and completely, carrying more contaminants with it.
- Follow your manual to drain oil. Some models use a drain plug, while others require an extractor through the dipstick tube.
- Remove and discard the old oil filter. It may be necessary to use an oil filter wrench if it is on tightly.
- Lubricate the rubber O-ring on the new filter to ensure a good seal and easy installation.
- Install the filter and refill with the required oil type and amount.
For 2-Stroke Outboards: No Oil Change Needed
A 2-stroke uses oil mixed with fuel, so there’s no sump or need for an oil change. Proceed to the next step.
Step 5: Fog the Engine for Internal Protection
Fogging protects internal engine surfaces with oil to prevent winter rust and corrosion.
- With the engine still running on the flushing muffs after the fuel stabilization period, remove the engine cowl and the airbox cover to access the carburetors’ air intake(s) or the electronic fuel injection (EFI) throttle body.
- While the engine is running at a fast idle, spray a liberal amount of fogging oil directly into each air intake in short bursts.
- The engine will begin to labour, run rough, and produce a large volume of thick, white smoke from the exhaust. This is normal and indicates the fogging oil is being drawn through the engine.
- Continue spraying the fogging oil into the intakes until the engine stalls and shuts down. This ensures that a final, heavy oil concentration has coated all internal components.
- Remove the spark plugs for the most complete protection and spray a final two-second burst of fogging oil directly into each cylinder. Rotate the flywheel by hand a few times to evenly distribute the oil across the cylinder walls, then reinstall the spark plugs.
Step 6: Lubricate All Grease Fittings and Moving Parts
This step expels water and coats moving parts to prevent corrosion while keeping smooth control.
- Using a grease gun filled with waterproof marine grease, locate and apply grease to all fittings (also known as zerks). These are typically found on the steering pivot tube, tilt mechanism, and throttle and shift linkages.
- Pump fresh grease into each fitting until clean grease purges from the joint. This confirms that old grease and any trapped water have been forced out.
- Apply a light coating of an anti-corrosion spray to the entire powerhead under the cowl, as well as any other exposed metal parts, bolts, and electrical connections, to protect them from atmospheric corrosion.
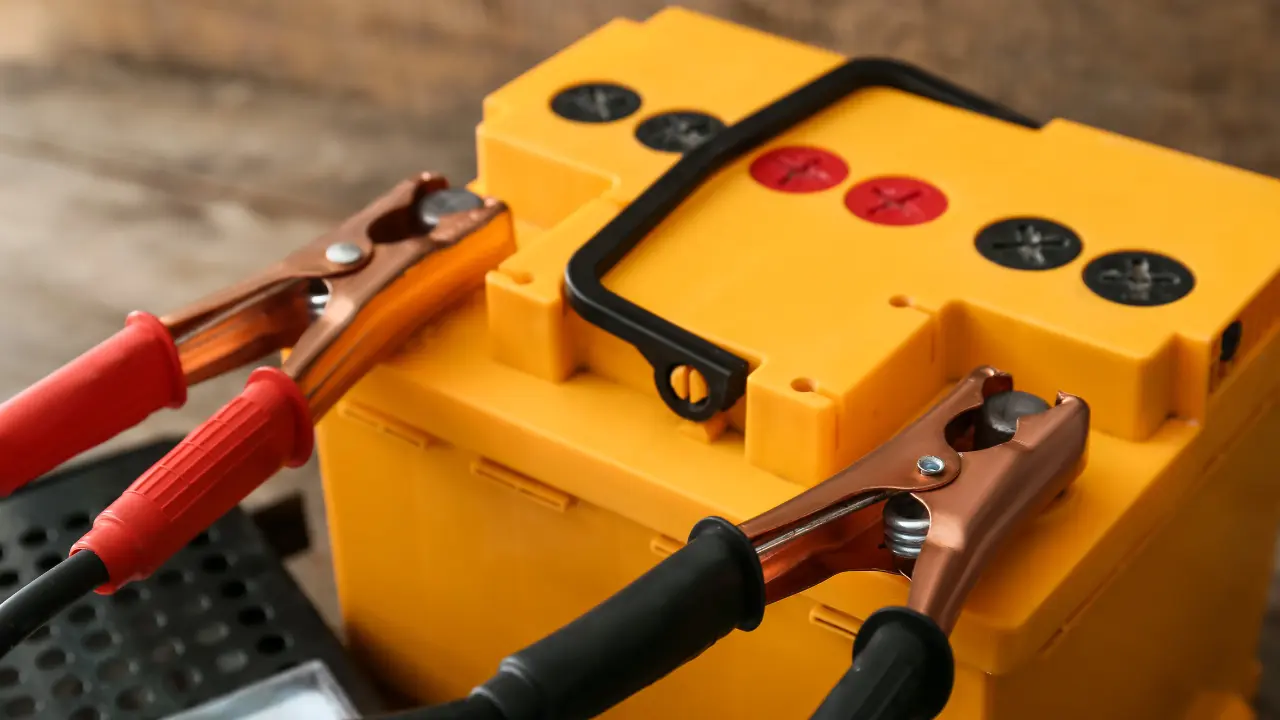
Step 7: Service and Store the Battery Correctly
Properly servicing and storing the battery is necessary to prevent it from slowly discharging over the winter. A discharged battery can freeze, causing the case to crack and leading to permanent damage.
- Disconnect the battery cables, first removing the negative (black) cable, followed by the positive (red) cable. This sequence prevents accidental short-circuiting.
- Remove the battery from the boat. Leaving it installed exposes it to cold temperatures and potential parasitic drains that can deplete its charge.
- Clean the battery terminals and cable ends thoroughly with a wire brush to remove corrosion. After cleaning, apply a thin coat of a battery terminal protectant spray.
- Store the battery in a cool, dry location, and off a bare concrete floor, which can accelerate discharge. A basement or heated garage is ideal.
- Connect the battery to a microprocessor-controlled “smart” battery charger. This device will monitor the battery’s charge and automatically keep it at an optimal level throughout the storage period, which is the best way to maximize its lifespan.
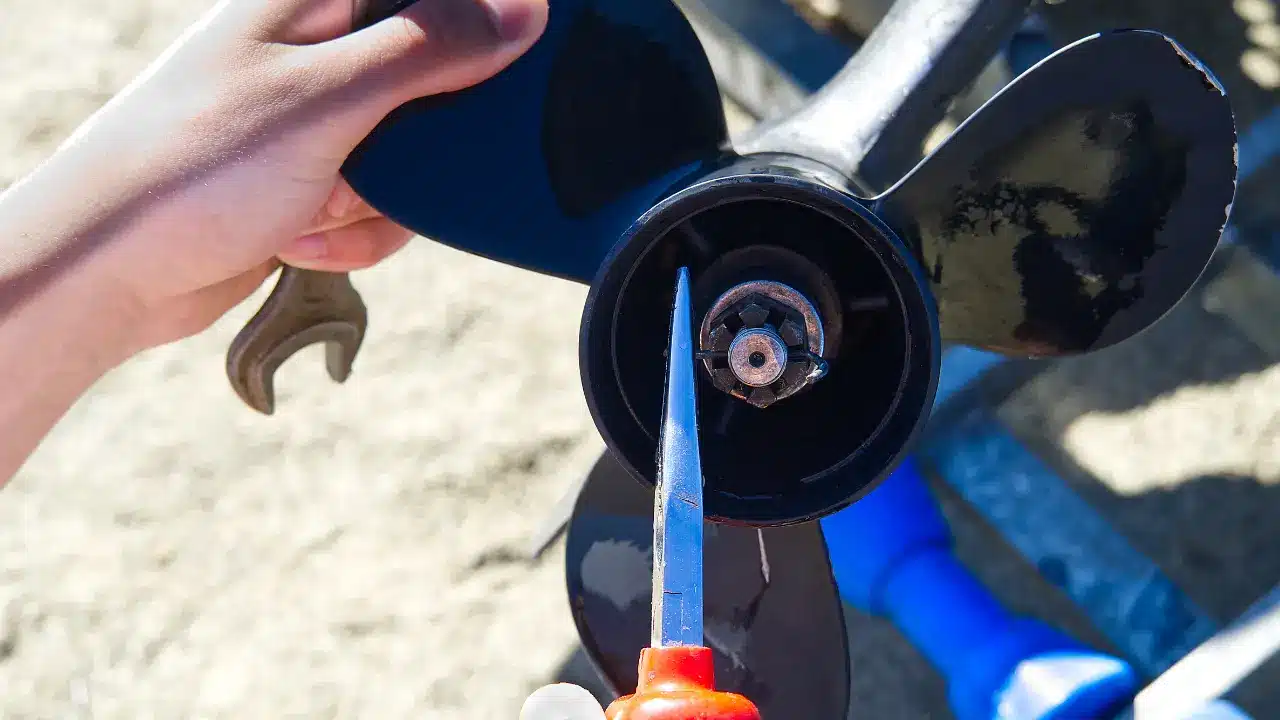
Step 8: Inspect the Propeller and Shaft
Addressing minor damage now prevents it from becoming a significant issue that could sideline the boat at the start of the next season.
- Remove the propeller from the shaft, using a prop wrench and a block of wood to prevent the propeller from turning.
- Carefully inspect the propeller blades for dings, dents, or chips. Even minor damage can affect performance and efficiency. If damage is found, send the propeller to a qualified repair shop during the winter.
Pro-Tip: Meticulously inspect the propeller shaft for any entangled fishing line, especially behind the thrust washer. The monofilament line can work its way into the propeller shaft seals, cutting them and allowing water to enter the gearcase, which is the problem that Step 3 is designed to detect.
- Apply a liberal coat of waterproof marine grease to the propeller shaft splines. This prevents corrosion and makes the propeller easier to remove in the future.
- To deter theft, either reinstall the propeller or store it separately in a secure location.
Step 9: Final Cleaning and Proper Upright Storage
To protect the engine’s exterior finish and, most importantly, to ensure it is positioned correctly so that any residual water can completely drain from the cooling system.
- Thoroughly wash and apply a coat of wax to the engine cowl and exterior surfaces. During storage, this protects the paint and finish from dirt, dust, and moisture.
Crucial Final Step: The engine must be stored in the full down, vertical position. This is a frequently overlooked but vital step. Outboard motors are engineered to be self-draining, and the vertical position is the only orientation that allows all water to exit the cooling passages and exhaust system by gravity.
- Cover the motor with a high-quality, breathable cover. Avoid using a non-breathable plastic tarp, as it can trap moisture underneath, promoting corrosion and mildew growth.
Top Winterizing Mistakes
Skipping or Improperly Using Fuel Stabilizer
The most common cause of engines failing to start in the spring is fuel system issues stemming from untreated gasoline. The mistake is often twofold: either forgetting to add the stabilizer entirely or adding it but failing to run the engine long enough to circulate the treated fuel through the entire system. Simply pouring stabilizer into the tank protects only the fuel, leaving the fuel lines and carburetors/injectors vulnerable.
The Fix: Always follow the procedure in Step 1. Add the correct amount of stabilizer and run the engine for 10-15 minutes to protect the entire fuel system.
Not Checking Gear Lube for Water
Many boat owners simply drain and refill the lower unit gear lube without paying close attention to the condition of the old fluid. This means they are missing a critical diagnostic opportunity. If water has contaminated the lube, simply replacing it does not fix the underlying seal failure. The gearcase will fill with water again and be destroyed by ice over the winter.
The Fix: Always drain the gear lube into a clean pan and inspect it closely. If it appears milky or creamy, this indicates a water leak that a professional technician must repair before storage.
Storing the Motor Tilted Up
A walk through any boat storage yard in the fall will reveal numerous boats with their outboard motors tilted up. This is a widespread and costly mistake. Storing an outboard in any position other than fully vertical will trap water in pockets within the cooling passages and exhaust hub. This trapped water cannot be drained and will inevitably freeze, causing cracks in the powerhead or midsection.
The Fix: The final storage position for the motor must always be completely down and vertical. This allows the engine’s self-draining design to function correctly, ensuring all water has escaped.
DIY vs. Professional Winterization
While winterizing an outboard is a manageable task for many DIY boat owners, there are situations where seeking professional service is the wiser choice. A professional technician performs the service correctly and can identify other potential issues that an untrained eye might miss.
Consider scheduling a professional winterization service if:
- The necessary tools, supplies, or a suitable workspace are unavailable.
- Time is limited, and the owner desires the guaranteed peace of mind that comes with professional service.
- A problem was discovered during the DIY inspection, such as milky gear lube, significant propeller damage, or suspected fuel system issues.
- The engine is new and still under the manufacturer’s warranty, as using a certified dealer for service may be a condition of the warranty.
- The owner wants the benefit of a trained technician’s comprehensive inspection, which can identify unrelated problems such as loose transom mounting bolts, a bent prop shaft, or improperly adjusted throttle and shift cables that can affect performance.
How to Winterize Your Outboard FAQs
Do I need to run antifreeze through my outboard motor?
No. Outboards are self-draining when stored vertically. Antifreeze is unnecessary, and its alcohols can damage cooling system seals.
What’s the main difference between winterizing a 2-stroke vs. a 4-stroke?
The primary difference is the oil service. A 4-stroke requires an engine oil and filter change. A 2-stroke does not. All other steps (fuel stabilization, fogging, gear lube) are essential for both.
Can I use automotive oil in my 4-stroke outboard?
No. Use only NMMA FC-W certified marine oil. It contains specific anti-corrosion and anti-wear additives for the high-moisture, high-load marine environment, which car oil lacks.
What happens if I forget to fog the engine?
Forgetting to fog exposes internal engine parts (cylinders, pistons) to moisture. This can cause rust and pitting during storage, leading to lost compression and a shorter engine lifespan.
Does an outboard motor need to be winterized?
Yes. Winterizing is essential. It prevents trapped water from freezing and cracking the engine, stops internal rust and corrosion, and stabilizes the fuel system to ensure reliability.
How do I keep my outboard motor from freezing in the winter?
Store the motor in the full vertical (tilted down) position. Outboard motors are designed to be self-draining, and this position allows gravity to empty all water, preventing ice from forming.